Homeowner’s Guide to River Rock Along a Driveway
We walk you through how we plan and install river rock along a driveway, from sizing and depth to fabric details and designing a sturdy trash-can pad.
Installing River Rock Along a Driveway: What We Walked Through With a Customer
We recently got a call from a homeowner’s dad — let’s call him Mike — who wanted to dress up the side of his son’s driveway before a big July 4th weekend party. He described a long concrete driveway with about four feet of bare ground between the driveway and the fence, running all the way back to a detached garage.
Mike’s plan was simple: lay landscape fabric, install river rock, and add a small flat pad next to the garage where trash cans could sit neatly instead of sinking into mud. He had even measured the space at around 520–550 square feet and was trying to figure out rock size, depth, and how much material he’d need.
We walked him through the same process we use on every river rock job. In this guide, we’ll share that step-by-step approach so you can understand how we plan, size, and design a clean, low-maintenance river rock border along a driveway — including a dedicated trash-can pad.
Planning a River Rock Border Along Your Driveway
Start With a Simple Site Assessment
When we look at a space like Mike’s, we first think about the layout:
- Width: In his case, about 4 feet between the driveway and the fence.
- Length: Roughly 130 feet, including a turn behind the garage (an L-shaped run).
- Surface conditions: No major removal needed — basically bare ground ready for fabric and rock.
We always ask homeowners to confirm whether there are any roots, old mulch, or debris that should come out first. The cleaner the base, the better the fabric sits and the longer the stone install holds up.
Choosing the Right River Rock Size
Mike asked what size river rock we usually recommend. We talked about 1–3 inch river stone, which we use a lot for driveway borders. From our experience:
- 1–3" stone is “medium” size, heavy enough not to migrate easily, but still small enough to cover fabric well.
- Very large stone leaves a lot of voids where you can see the fabric underneath, which most homeowners don’t like.
- Smaller 3/4" stone can work too, but it tends to travel more and feel less stable under foot.
When we meet clients in person, we usually show them multiple stone sizes and colors, but 1–3" river rock is our go-to for a neat, finished look along a driveway.
How We Size the Project: Square Footage, Depth, and Yards
The Simple Formula We Use With Our Clients
Homeowners often ask us how we figure out how many yards of stone to order. With Mike, we walked him through the exact math we use:
- Measure area in square feet.
He had about 520 sq ft (4 ft x ~130 ft, plus the section around the garage). - Decide on depth.
For river rock, we typically recommend 3 inches deep for good coverage over fabric. - Convert to cubic feet:
Square feet × depth (in feet).
520 sq ft × 0.25 ft (3 inches) = 130 cubic ft. - Convert cubic feet to cubic yards:
Divide by 27.
130 ÷ 27 ≈ 4.8 cubic yards.
We then factor in compaction, settling, and any irregularities. In the call, we explained that around 6 yards of stone — roughly 9 tons — was a realistic number for his project at 3 inches deep over about 520 sq ft.
Why 3 Inches Usually Works Best
When we design driveway-side rock installs, we almost always land on about 3 inches of depth for river stone. Our reasoning:
- Deep enough to completely hide the fabric and avoid “bald spots.”
- Heavy enough to stay put when people walk on it or when you set items (like trash cans) nearby.
- Not so deep that it becomes tough to walk through or wastes material.
If a client wants a more decorative, chunky look or expects heavy foot traffic, we sometimes bump it slightly, but 3 inches is the number we use as a baseline in our estimates.
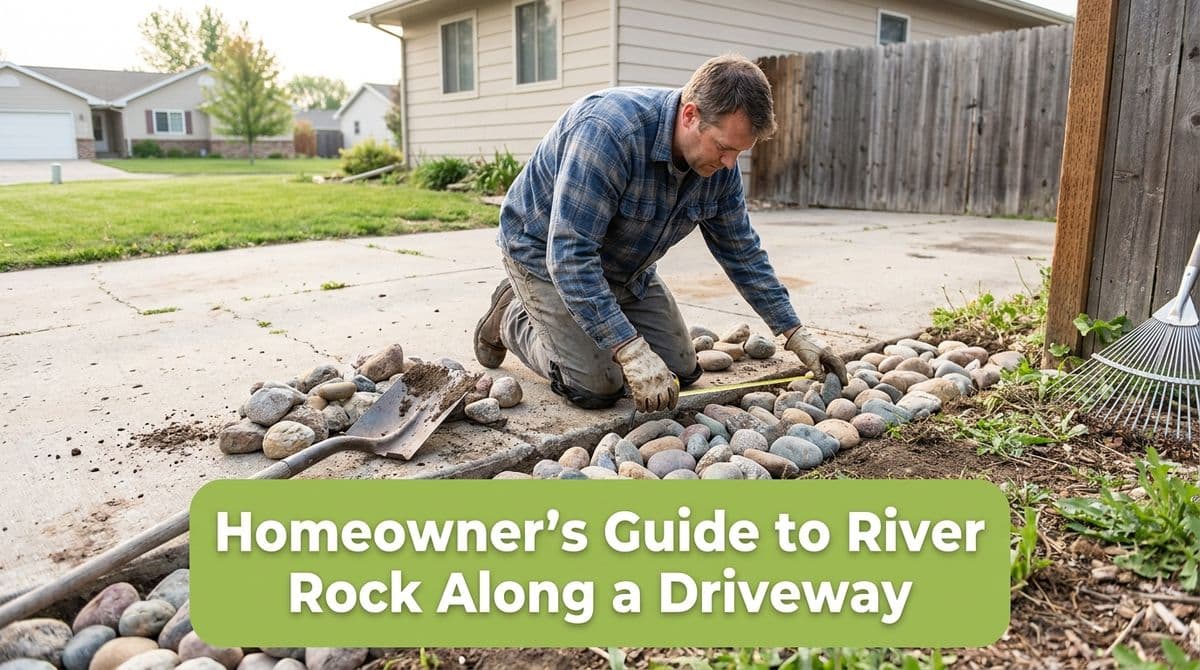
Getting the Base Right: Fabric, Edges, and Transitions
The Landscape Fabric We Recommend
On the call, Mike mentioned “basically putting down landscape fabric, installing the rock.” We agree with that sequence, but we’re particular about the details. When we install, we typically:
- Use a professional-grade woven landscape fabric, not thin plastic sheeting from a big-box store.
- Overlap seams by at least 6–12 inches so weeds can’t push through gaps.
- Pin the fabric securely with landscape staples, especially along the driveway edge and fence line.
We also clear out any sharp debris so it doesn’t puncture the fabric from underneath. That step alone saves a lot of headaches a year or two down the road.
Working Around Fences and Driveways
Because Mike’s project ran between a driveway and fence, we talked through how we handle edges. In similar installs, we:
- Run fabric slightly up the fence line to discourage weeds right against the posts.
- Keep a clean, straight line along the driveway so the rock doesn’t spill over where car doors open.
- Sometimes add a subtle metal or plastic edging if a client wants an extra-crisp separation.
Every property is a little different, but the goal is the same: a tidy, low-maintenance strip that stays in place and looks intentional.
Designing a Trash-Can Pad Within the Rock
Planning the Size and Location
Mike’s son wanted a dedicated space by the garage where trash cans could sit on something solid, not on loose rock. That’s a request we hear a lot. When we design these pads, we walk homeowners through:
- How many cans? Two or three standard cans need roughly 3–4 feet of depth and 4–6 feet of width.
- Access paths: We make sure you can roll cans easily from the driveway to the pad.
- Drainage: We keep the pad just slightly above surrounding rock so water doesn’t collect.
In layouts like Mike’s, we usually tuck the pad alongside the garage wall, tying it neatly into the river rock border.
Materials We Like for Trash-Can Pads
On the call, Mike mentioned “some flat stones, some flat block or something.” We talk clients through a few good options:
- Concrete pavers or patio block: Clean, uniform, and easy to hose off.
- Large, flat stepping stones: A bit more rustic, but still stable under cans.
- Small poured concrete pad: Most permanent, best if you never plan to move it.
Whichever route we choose, we prep the base separately from the river rock: compacted stone base, leveled sand, and then the pavers or blocks. The river rock then transitions up to the edge so everything looks like one cohesive design.
How Long Jobs Like This Take (and How We Schedule Them)
Typical Crew Time for a 500+ Sq Ft Rock Install
On the phone, Mike guessed the job might be “a morning or an afternoon” project. We explained that for about 520 sq ft at 3 inches deep, with around 6 yards / 9 tons of stone, our three-person crew can usually complete everything in a full day, including fabric, rock, and the trash-can pad.
We’ve done enough of these installs that we can say with confidence: it’s not a tiny job, but it’s absolutely a one-day project when we schedule it between larger hardscape jobs.
How We Help Homeowners Get Started
With Mike, we suggested he send photos and measurements through our consultation form so we could confirm the layout and give a clear price. That’s the same process we use with any homeowner considering river rock along a driveway:
- Review photos and measurements you provide.
- Recommend stone size and depth based on how you’ll use the space.
- Design any special features, like pads for trash cans, AC units, or storage.
- Estimate yards/tons of stone and set realistic timing for the work.
If you’ve been staring at that muddy strip along your driveway and wondering how much rock you need, what size to pick, or how to tie in a trash-can pad, we use this same step-by-step approach to guide you from rough idea to a clean, finished, party-ready space.